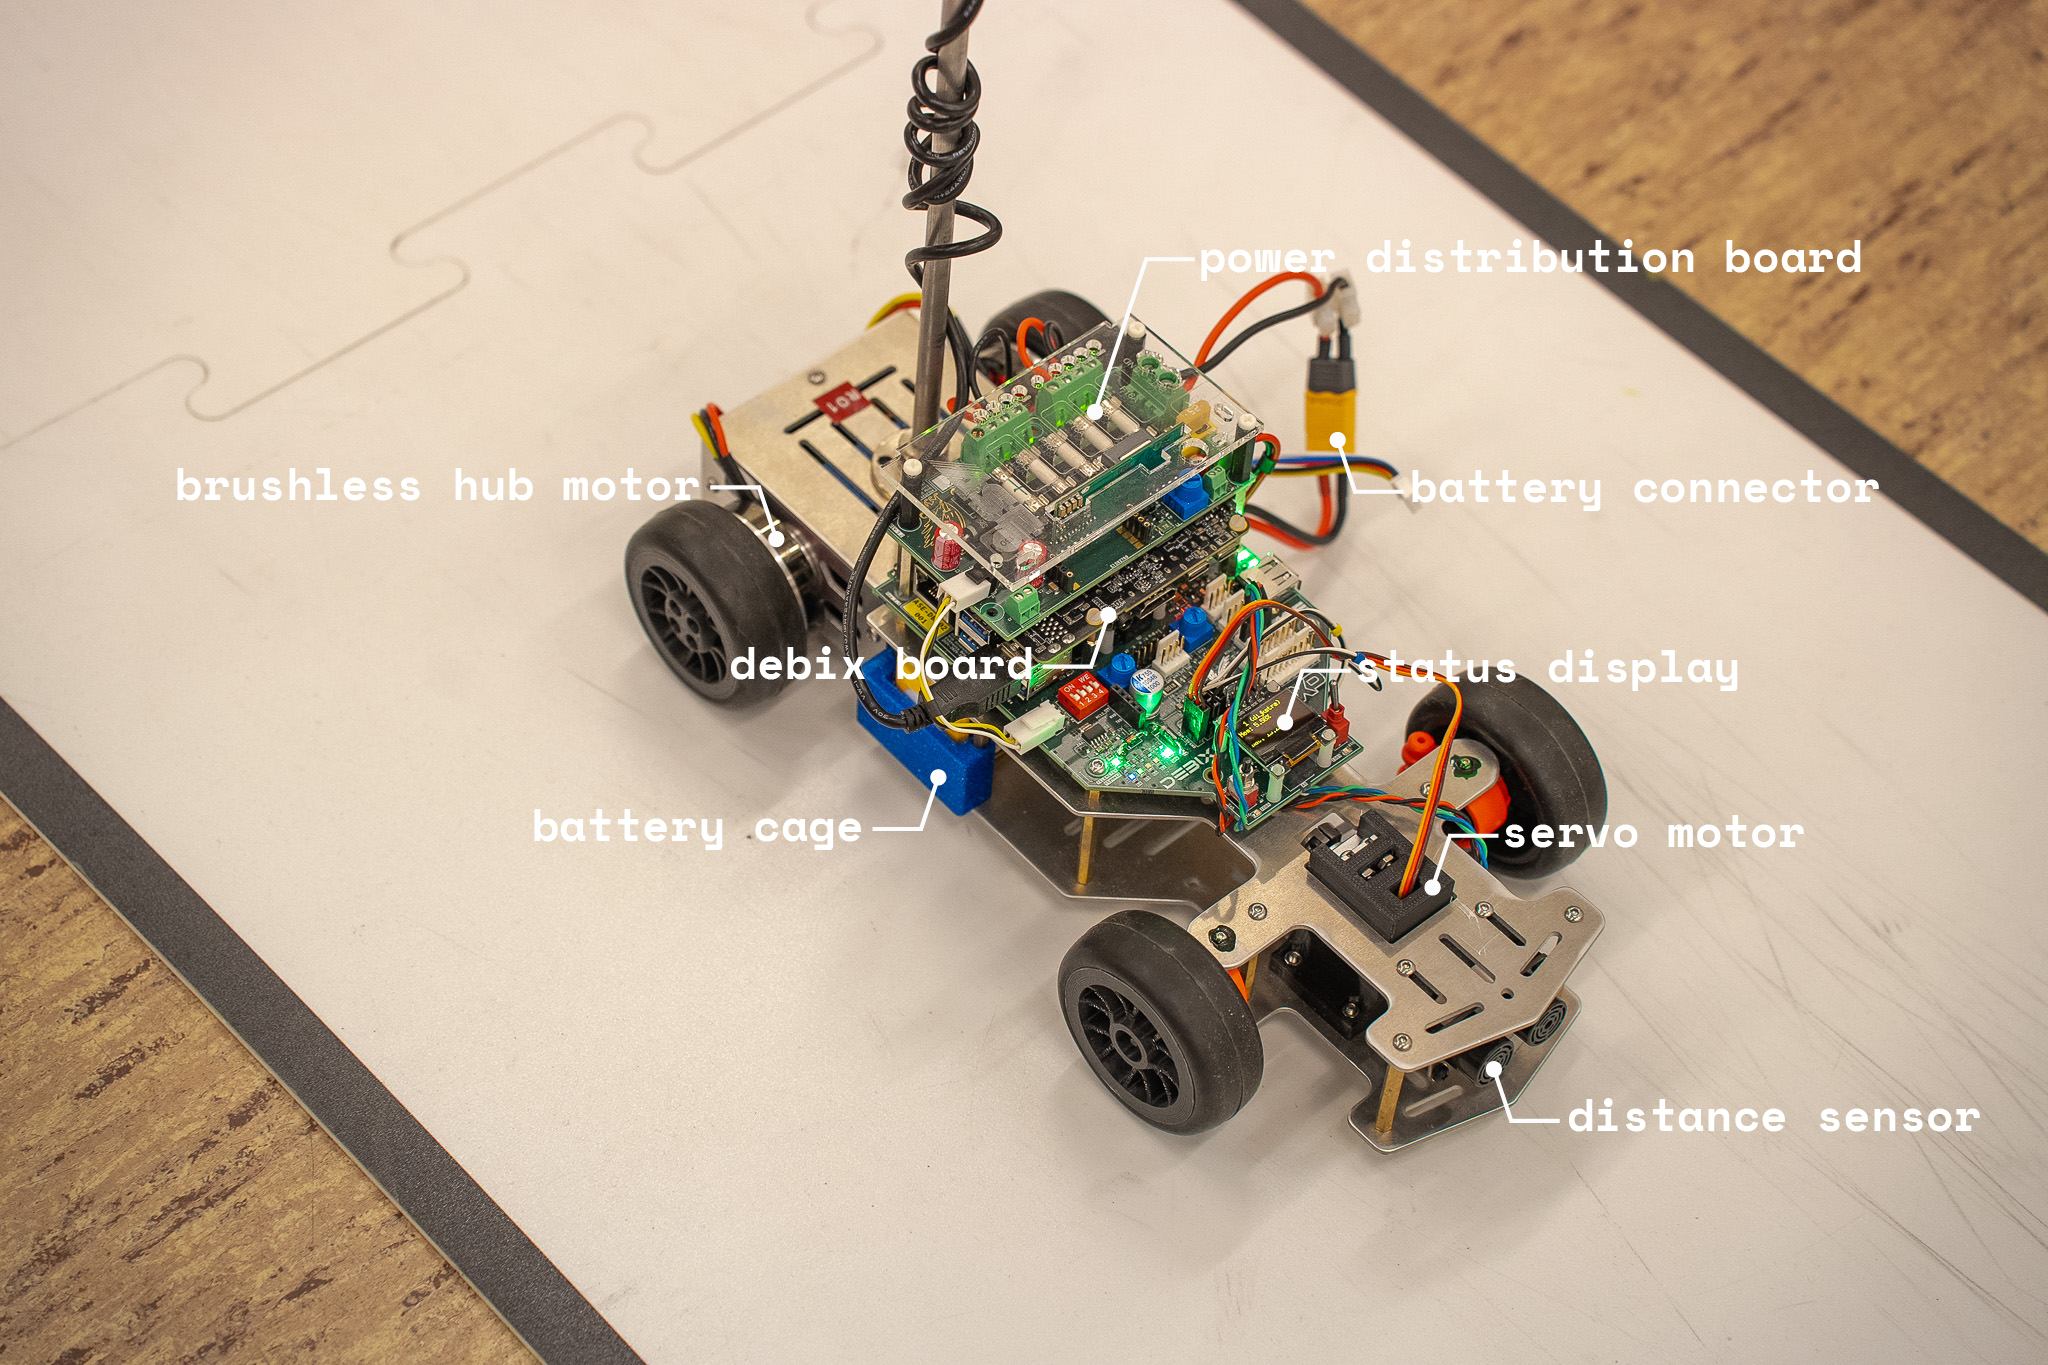
Getting to Know the Rover
You will find that some terms and hardware parts will be referred to frequently throughout our docs. In this guide we will briefly introduce them.

Elias Groot
Software Lead, Project Admin
Grab your Rover but do not power it on yet. You will see a lot of different parts, among which are sensors, compute, actuators, a power distribution board and integrated circuit board to connect it all. You can find a detailed description of all components here. Many parts you should just take for granted - no need to read up on them - but there are a few parts that you should know.

The Brain: Debix model A
All software runs on our Debix model A, which we more commonly refer to as just the debix. The debix is a single-board computer (SBC) at the size of a credit card. It packs 8 GB of RAM, a powerful quad-core i.MX 8M Plus processor and a dedicated Neural Processing Unit (NPU). It even has an HDMI port and several USB ports that allow you to plug it into a monitor and use it like a normal computer, but you will most likely interact with it in headless mode: using a remote SSH shell started from your own laptop.
Out of the box, the debix comes pre-installed with an Ubuntu 22.04 installation with a custom kernel module configuration and additional ASE tooling installed. This includes some essential safety tools to avoid discharging batteries below their critical voltage - you will see why in the dangers section. The installation is flashed to a micro-SD card which serves as the filesystem of the debix as well. You can safely swap out and replace micro-SD cards after the debix shut down properly. If you ever need to use multiple micro-SD cards, let us know. We can (remotely) flash and configure them for you. If you want to install your own OS confirm that you understand the potential dangers and take a look at the official Debix images here.
Once power is connected to the Rover it takes around 15 seconds to boot up the debix. Once it successfully booted up, you can see a red status LED blinking. Before you remove power from the Rover, you should shut down the debix properly by holding the small shutdown button or running sudo shutdown now in your SSH terminal. After shutdown, the status LED will stop blinking.
Field-Oriented Speed Controllers
The rear wheels are spun by two brushless motors, which are in turn controlled by two Field-Oriented Control (FOC) Electronic Speed Controllers (ESCs). FOC ESCs open up an entire field of research on their own, but their main purpose is to allow for very precise speed controls and active braking - which was especially useful during races, to allow higher top speeds while braking in the corners.
The ESCs are flashed with their own custom software written in C++ and communicate with the debix using Pulse Width Modulation (PWM) signals. You will most likely never find yourself needing to modify the ESC control software that we ship with the Rover, but it is good to know that you can. The ESCs are commonly referred to throughout the docs and should be handled with care during calibration, but more on that later.
Sensors and Actuators
As is common, we refer to parts that are "data inputs" as sensors, such as the equipped camera and lidar sensor. We refer to "data outputs" as actuators, such as the motors (or more accurately: the ESCs) and the servo motor that controls the angle of the front wheels.
You can read from sensors and control actuators using the driver service software we provide. Interacting with these drivers is language agnostic, but we supply kick-start repositories and tutorials for C, Go, Python and Rust.
Working with the Rover and its components is not without dangers. Before you power on the Rover for the first time, review these dangers and the necessary precautions on the next page.